Tuesday, September 20, 2011

Bridal Lingerie Pillow.... Tonight... Not Tonight!

Front (depending on the night)
A friend of mine is getting married!  Yay!   Instead of buying lingerie, I made her this.  Now that I think about it, it should've said "Tonight" and "Definitely Tonight!!" considering they're going to be newlyweds :)  But, instead, I went with the traditional.

Supplies:

1 yard burlap
Sewing machine and thread
Stencils
Tape (for accuracy lines)
Fabric paint
Foam brush
Pillow stuffing
Tassels (keepin' it sassy!)
Lace (if you want accents, this was an afterthought on my part)

First, tape straight lines to help keep the letters straight.  Lay stencil over the burlap and use the foam brush to fill in the stencil (hint: if the letters on the stencils are too close, cover them with tape).


Once paint is dry on both sides, turn the fronts facing each other and pin the tassels in the corners and pin in place.  Sew around the pillow leaving enough room to stuff the pillow.  Stuff the pillow making sure to fill the corners.

Make accents to put on top of the pillow.  I made burlap flowers using this tutorial.  I used some leftover lace and put beneath one of the flowers.  Sew the accents on the pillow.  Sew the pillow closed.

back:  again, depending on the night.  haha

Fall Napkin Rings... How festive!! (PB inspiration)

Original: Pottery Barn napkin rings, $6 a piece! 
I work at Pottery Barn and they always have the coooolllest stuff... but Pottery Barn is insanely expensive. Usually I like the smaller things because they're closer to my budget, but I couldn't imagine spending $36 on these napkin rings....

So.. I went to Joanns and found these cool little leaf things for $1.99... that were half off of that, so $1.00, then I used a 15% off coupon for all.  So, I spent like $6 on everything (instead of $6 per ring!!).


 The floral piece was very flimsy at the bottom, so I wanted to strengthen it with floral wire and tape to make it more sturdy like a napkin ring.  I had all this stuff around the house so it made it cheaper, but I'm sure you could use duct tape or something to make it cheaper.  Once I wrapped the wire and the tape, the  piece looked really strange so I had to figure out a way to cover the green....hence YARN!!  So, I covered the bottom with glue and wrapped the yarn tightly around....  wa lah... $1 napkin rings for fall :)

My home made PB napkin rings, $1 a piece.. much better! 
Final product with my fall napkins.  yay ;) 

Monday, May 9, 2011

Mother's Day "Magik Sticks"


We bought vases for Mother's Day in hopes of filling the vases with water and flowers.  Well, as soon as we brought the vases home and filled them with water, they leaked from every side!  Awesome... not....  Personally, I think it's a bit weird to give fake flowers as a gift.  Flowers aren't really my thing, but fake flowers are especially strange.  So, we had to get creative.  Jason's nieces call their mom's cooking utensils "Magic Sticks."  So, we decided to make a sign to hang on the vase that said "Mom's Magik Sticks" in little kid handwriting.  On the back, Kingston (our dog), signed his name with his paw print :)   Cute, right?  I thought so too!  We then bought wooden spoons (the nicer kind, not the cheapos) and burned their names and initials on the sticks.  Assemble it all together and it makes quite the gift :)


1. Organize Supplies
2. Wood Burn

3. Stain


4. Decorate

Monday, May 2, 2011

Save the Dates, pull string style!


We wanted to create a cute way to send the dates to our friends, and spent several hours doing so!  Good news for us was that we were iced in the apt for nearly 4 days, so we had plenty of time!  Our inspiration came from Miss Martha Stewart herself... Martha Stewart Save the Date.  We put our own spin on it though, and used the school's TRAC (Teacher Resource Activity Center) for the die cuts instead of buying a $200-$300 circa machine. Gotta find a break somewhere!

You do not need to follow exactly.  Get creative with this one! 

Supplies:
Card Stock (pre-made letter size is easier)
Ribbon cut into 8"-12" strips
Wallet size photos (can print on Walmart.com 4 to a page and have them ready for you)
Miniature envelopes  (paper-source.com or Joanns)
Numbers  (The TRAC center had a computer that did all the cutting for us.  Without that, the project wouldn't be worth it!)
Print-out with your names and webpage.  I printed this on regular paper and cut-out. 
Slinder hole punch for the numbers (regular round ones are too big.  You can find various shapes of hole punches in craft stores)
Save the Date stamp for decoration
Tape squares for the back of the print out
Corner squares for the picture
Gluestick that dries clear
Xacto Knife for the slit in the paper for the envelope
Friends to help!!  Very important!

1.  First step, cut out the numbers using a circa machine or school craft resource office (like we did...).  The TRAC center only charged us $0.80 for the paper.  WAY cheaper than $200!  Make sure to cut enough numbers and some extra for mess-ups.  For instance, our date is 06-25-11, so we had 60 of each number and 120 1's.  We also cut out small circles using the machine to secure the ribbon with glue inside the envelope and small tags for the "pull" part.

On that note, you might want to write PULL on the tag... we had phone calls from ppl saying "Where's the date?"  Geez ppl! 

2.  Punch holes in the numbers and string the ribbon through.  We glued the numbers to the ribbon at the top to keep from sliding around. This was the most time-consuming part!  If we did it again, we def would find a better way.  Make sure to add the circle at the end of the ribbon so you will have something to glue inside the mini envelope


3. Glue the circle at the end of the ribbon and paste inside the envelope.  Make sure to leave enough room for the numbers to fit inside.  Also, make sure you keep the envelope open enough to not glue it shut.

Recruited Kristyn to help with this project :)  Much needed! 
4.  Create a slit with the Xacto knife for the mini envelope to peak through the card stock.  Will need trial and error paper for this.  Make sure you have steady hands!
Back.  After envelope is through slit and glued to the back


5.  Once the slits are finished and the envelopes are dry, slide the envelope (with numbers folded inside) through the slit, and paste to the back of the card stock using the glue stick (See above).


6. Meanwhile, use the square tape stickers  and corner squares to tape the picture and the name print out to the card stock.  The squares give the picture and label a 3-D effect. 

7. Decorate with outside with stamps, ribbons, etc...  Get creative....

In hindsight, we should've written "PULL ME" on the bell....
8. Address the outside envelopes and send em' out!!!

Will you be my bridesmaid? .... Paper Chain


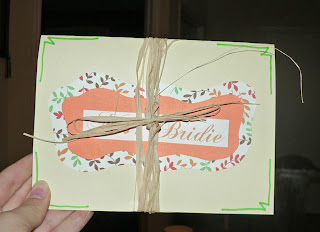
Once Jason and I chose our wedding party, we tried to keep our mouths shut to them so we could do something creative to officially "ask" them to be a part of the party.  I think he ended up calling his side, but I did something a bit different for mine.  It wasn't until after I made the first card that I realized I had to make 5 of them!  Whoa!  Not sure why I didn't include that in my numbers. So, I recruited Jason to help me finish up.  He's such a good sport! Here's my inspiration: Bridesmaid Paper Chain  Since this was our first official wedding craft, it was def a ton of fun to make!  Especially, dressing all the dolls to each of the girls (Kristyn's adorable red hair had to be my fave!).

Supplies:
I large poster board paper  for every two party members (thick enough to be sturdy, but thin enough to fold with ease).
Colored construction paper for hair
Markers
Glue stick
Raffia for decorating (this makes the shipping a bit more expensive if you choose to use this)
Card with note and anything you want them to know about being part of the party
Envelopes


Inside
Back


1. Create your card.  I made a simple front and back design and printed at home.  "Will you be my bridesmaid?" with a hand-written note to each girl was on the front.  Instructions, outfits, important dates, etc.. were listed on the back.

2. Cut the poster paper in half length wise.  Fold accordion style making sure to include a layer for the bride and all bridesmaids.


3. Draw your doll, making sure to draw the arms and/or legs outward to keep the paper connected once you cut.  Also, make sure your doll is not too tall or wide for your envelope (obvious one here..).

4. Cut your shape.  Once again, make sure you leave an area where the layers still connect.

5. Cut dresses and hair styles of the girls using colored construction paper.

6. Draw faces and sign names using a marker
Kelley's kids are part of the wedding, so I included the little ones in her card :)  A for Amber and B for Bailey

7. Tie all dolls and the card together using raffia.

Thursday, April 28, 2011

Beers and Brushes--keepin' it country! ha!

You know the new trend, Cockails and Canvas, Sips n Stokes, Dips n Dabs, Dips n Sips, etc.. you get the drift.  Well, these businesses are turning up everywhere!  Basically, every night has a certain painting that everyone learns how to do.  The instructor stands up front and shows you step by step, color by color, how to paint.  Meanwhile, you get to sip your wine and eat your crackers (hence "Sips n Strokes").  It's so much fun to go out with the girls and learn how to paint.  We went for my birthday last year and it was great, however, it wasn't easy on the wallet.  And, was hard to see at times b/c the place was packed.  After spending $30 a person, we knew there had to be an easier way.

So, for my friend Kristyn's bday, we each chipped in $10 for canvases, paint (most of which we already had), and brushes.  We covered the table in old towels and newspaper, cut up old milk jugs and filled with water to clean the brushes, and filled paper plates with dabs of primary paint colors (you know those colors you learned about in grade school...).  We used stands to hold up the canvases (had to get creative on this one).  Then, we googled fun pictures we knew we could paint based on our "expert painting skills."  :)


We found a simple tree painting on google (I think we searched "abstract tree painting), and kept the painting on the computer screen for all to see.  The computer was our instructor :)  Then we jumped right in to painting and worked our way trying to figure out how the painting was done. First starting with the background, then adding the tree, then the white for highlights.


This is what we came up with.....  Considering we had only painted once before, we did a pretty good job if I do say so myself!

Wednesday, April 27, 2011

Quick and Easy Restoration

Before: dingy, dark, and scratched 

We found 6 antique chairs for $100 at a local antique shop.  Although they squeak a little, it was a heck of a steal!  The quickest way to restore furniture without whipping out the sanders and stain, is some updated fabric, some furniture oil, a staple gun, and some old rags.  And whala, your $17 chairs are brand new again!

Supplies: 
Chairs with separable cushions
About 3/4 yard fabric for each cushion (ironed)
Quilting stuffing to make the cushion softer (found at Joann's near the pillow stuffing)
Finishing Oil (We used "Restor A Finish" in walnut, $6.95 at local antique store)
Staple gun and staples
Old rags
Screw driver
Scissors


1. Flip chairs upside down and unscrew chair cushions from each chair.

2. Remove old fabric if you wish

3. Lay cushion  and quilting stuffing on top of fabric to measure size, making sure to leave at least 4-5 inches around the sides to fold back the fabric.


4. Cut fabric in squares measurement to the cushions.  Fold in corners VERY tightly and secure with the staple gun.  Once corners are staple tightly, secure the sides with staples.


5. Move the chair frames outside or on top of newspaper to prevent the oil from affecting your floor.  Add oil a little at a time to the old rag and buff the chair.  Wipe softly with a clean rag to remove excess oil.


6.  Allow the chairs to dry in a well ventilated area at least an hour.  (We let it dry all night just to make sure).

7. Assemble cushions to newly oiled chairs with original screws.  It helps if someone sits on the cushion to keep it secure.

After: Clean, bright, polished
8.  Cook a nice dinner to celebrate your new chairs :)